Reports
You can schedule daily, weekly or monthly reports. Once scheduled, reports are automatically emailed to your chosen recipients and include summaries for sites (and associated channels) of your choosing. You can optionally include charts and alarm notifications for a more detailed report, and can download a PDF of your report at any time. You can customise your reports extensively, including what sites you would like to report on, who the report should be emailed to, what day and time the report should be emailed and what the report should look like.
Setting up automated reporting is easy. In this section we show you how to create, edit and delete your Zednet reports.
How to create a report:
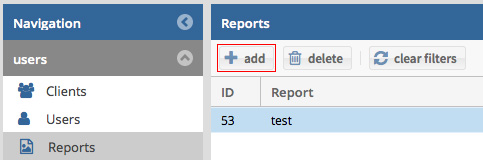
- In the navigation panel select the Reports option.
- To add a new report, click on the add button at the top of the centre panel.
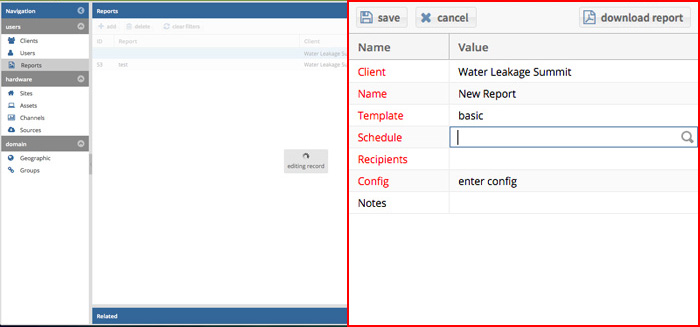
- Select the client that your new report belongs to, give your report a name and choose a template for your report in the properties panel on the right.
- The most important part of your report is its schedule. To specify your report's schedule, click on the magnifying glass in the 'Schedule' field.
- You will then be prompted to choose how regularly you want your report to be sent. Start by specifying if you want the report to be sent every day, week or month. If you are creating a weekly or monthly report, select the day of the week or month that you would like the report to be sent on. Lastly, select the time of day that you would like your report to be sent at.
- To specify who you would like the report to be emailed to, first click on the magnifying glass in the recipients field. Then, choose the recipients of your new report by clicking the check-boxes next each user's name in the resulting list and press the submit button.
- Next, configure the contents of your report by clicking the magnifying glass in the configuration field. Start by filling in the report's intro text, which forms the email reports body. You can then choose which of your client's sites you would like to include in your report. By default all of your client's sites will be included in the report. By pressing the drop-down arrow in the 'Report on' field you can also choose to exclude selected sites or only include selected sites from the site selection box below. Once you have finished configuring your report, click the submit button to save your configuration.
- Finally you can add notes to your report. You can use this to record any information relating to the report that might be of interest to you. These notes will not be included in the report itself.
Creating a new report
Fill in the basic report details
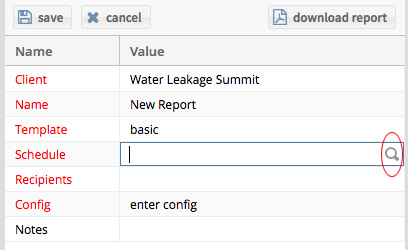
Clicking the magnifying glass lets you edit more complex fields
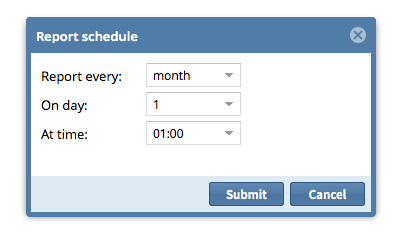
Choose your schedule
Note: A report will contain data for your client's sites only as far back as you select in your report's schedule. In other words, if you select a daily report, the report will contain the last 2 days of data. If you select a weekly report, the report will contain the last 7 days of data. Similarly, if you select a monthly report, the report will contain the last month of data.
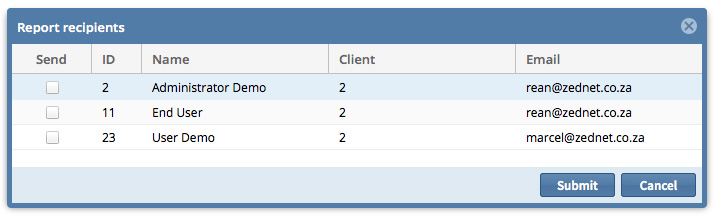
Select recipients
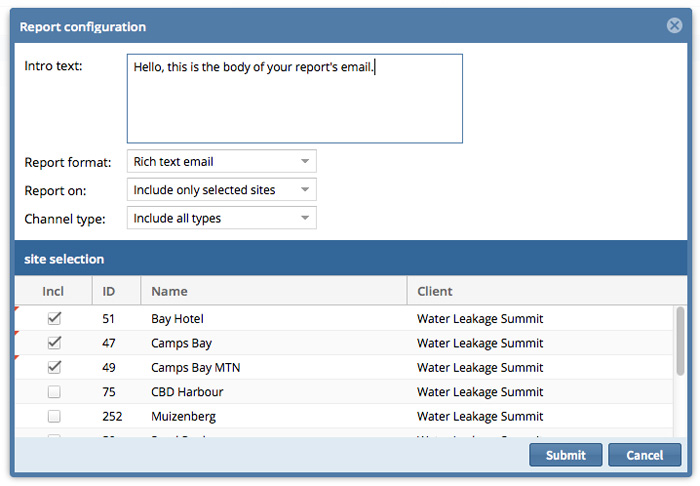
Configuring a report to only include sites of interest by clicking their check-boxes
How to edit or delete an existing report:
- To edit an existing report simply click on the report you would like to change. Then, make your desired changes in the properties panel and don't to press the save button to save the changes.
- To delete an existing report, select the report you would like to delete and press the delete button. If you are certain you would like to delete that report, click Yes.